Creating artwork is fun. Choosing a medium is delightful. It is primarily based on what you are capable of doing, what you know, what you are interested in learning, what you are interested in sharing. I would like to share with you some of the doing, knowing and learning involved in the Ideamen art. I bumped into a program – Pov-Ray – a long while back, downloaded it, stared at the screen, tried to read and understand the code shoved in my novice face, failed. Hit “run” a few times, watched it render the sample scenes a few times, and put it on the back burner. Waaaaay on the back burner. None of that made any sense. Well, some of it made sense, but it was too much to take in all at once. Intriguing. But way beyond my pay grade.
Fast-forward to after programming. Learning a programming language is like learning most of the programming languages at once. Once you grind your way through one or three, you can make sense of much of what you see in another. I waded into programming languages initially doing html and javascript for my bands. Really simple stuff, never really understood what I was doing but did it anyway. Through a few good iterations of learning various languages and after learning lsl in Second Life I bumped into Pov-Ray again and finally understood it. Like really understood it. It was awesome! It was like walking into an ocean and being able to breathe. I want to share that with you. Here’s the Wikepedia page about Pov-Ray.
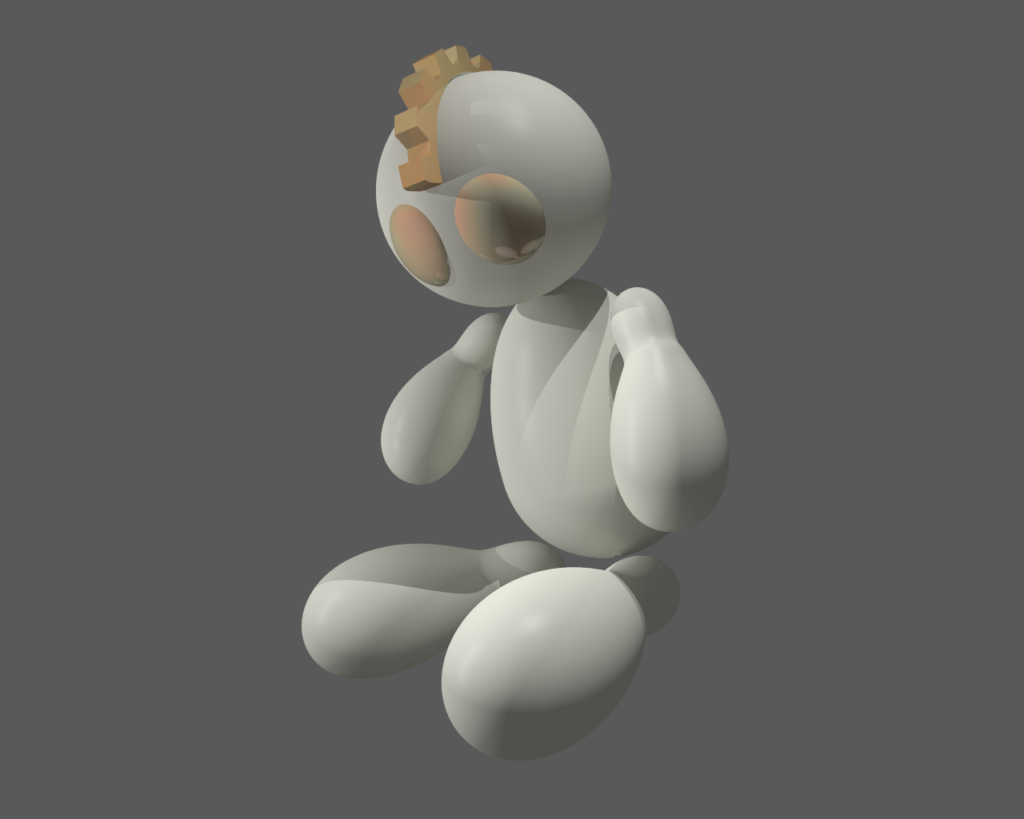
This may not be for the feint of heart, but it ain’t rocket science. First, you’re going to have to install a program. Then grab some files. Then click “run” like I did. None of it will make any sense, but never mind that. You’ll get this:

You don’t have to do anything more than this. Just render one image and giggle in joy because you did it. It’s fun. But if you dig, you can edit it.
First, download and install Pov-Ray:
The overview download page is here.
A quick link to the Windows .exe is here.
Then download the custom files that make it happen:
The zip file with everything you need is here.
A folder with everything including the zip file for those who want to see it, is here.
Save those in a place you can find them. If you got the zip, the extracted folder is where your files are. If you downloaded them individually, you know where they are.
Open Pov-Ray, poke around, and render a couple of the sample images just for kicks. Then eventually click the “Open” button and open the poseGearHeadKid2016.pov file, and maybe the other ones if you want to look at them. While you have the poseGearHeadKid2016.pov open and in focus, hit the “Run” button and the image will render. If you’re courageous and want a larger image, you can fiddle with the render options (sizes and such) at left top just under the “New” and “Open” buttons. I had the demo image set at 1280×1024, 5.4, AA 0.3. Run it! Click the “Run” button and it will render. Now there will be an image in that folder called poseGearHeadKid2016.png. That’s your rendered image.
The files included are:
gearHeadKid2016.inc – The meat of the Gear head kid. This is where it’s defined. There’s a lot of stuff in here and you shouldn’t have to edit any of it. But look at it anyway because you should see the bones, for context.
myTextures.inc – Some textures used throughout. Meh.
simpleShapes.inc – Some shape stuff. Easier to create a template and use it later with a few simple variables. The first thing in there is my SRT (that’s Scale, Rotate, Translate), the stuff that lets you move things around in my Pov-Ray files. I use it everywhere because scaling, rotating and translating things are the things that you do to stuff, and that is the order they are meant to be done in. Anytime you see this, the variables are scaling, rotating, and translating what you see. The format is like this: SRT(<1,1,1>,<0,0,0>,<0,0,0>).
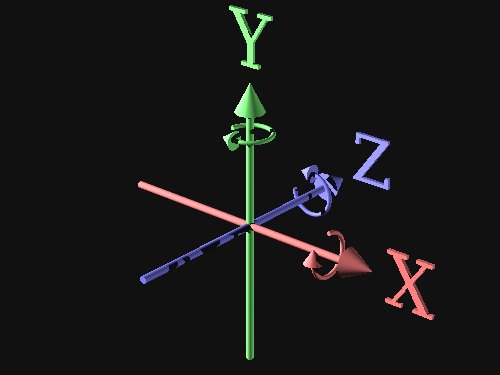
orientation_xyz_med.jpg – That’s an image that describes the Pov-Ray orientation system. If you’re looking to move and rotate things using the SRT, this is a thing. The second two variables in the SRT are rotation and translation. If you’re unfamiliar with the format (and that’s totally ok), it goes <x,y,z>. Zero is zero. X is right and -left, Y is up and -down, Z is forward and -back. Rotations are positive towards the arrows, negative against.

Now you can play with it, break it, fix it, and do things you didn’t know you could do. Or did. There are so many things I could tell you about but won’t because this is not the medium. There’s radiosity, cameras, lighting, texturing and the whole CSG thing (Constructive Solid Geometry) and unions and differences and all the stuff you’ll find when you dig down this hole. But you don’t need to know that. Yet. Just run it! Dig later.
Have fun and share with us if you render some images!

